Perfect Grand Canyon, Zion, and Bryce Canyon Road Trip Itinerary
Are you planning an epic road trip to Grand Canyon, Zion, and Bryce Canyon National Parks and overwhelmed with all the details?
I visited all of these national parks on an epic camper van road trip with my best friend. We had a blast journeying through Nevada, Utah, and Arizona, and now I am sharing our exact itinerary with you!
In this guide, I’ll provide a day-by-day breakdown of this one week road trip that includes Grand Canyon National Park, Zion National Park, and Bryce Canyon National Park, plus Antelope Canyon, Horseshoe Bend, Lake Powell, and Valley of Fire State Park! How’s that for an action packed itinerary?
This itinerary was pretty intense to plan, so I really hope to make it easier on you! Below, I’ve included all the details of our trip, including each stop, driving distances and times, where we stayed, and more.
With this blog post, you’ll be ready to take your own epic road trip through some of the best national parks in the USA.
Happy exploring!
Itinerary Details & Things to Know Before You Go
Here’s a quick day-by-day breakdown of this road trip so you can easily see what to do, where to stay, and what to book in advance!
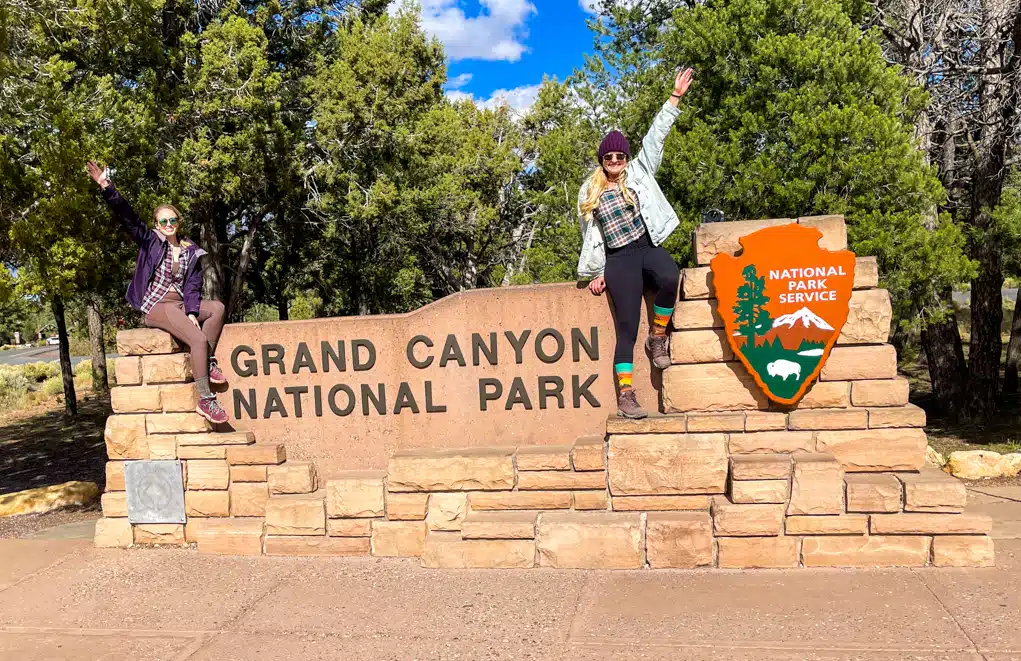
Day 1: Arrive in Las Vegas & Drive to Grand Canyon 🚗🌄
🏨 Stay: Mather Campground or Yavapai Lodge or Bright Angel Lodge
Day 2: Explore Grand Canyon & Drive to Page, Arizona 🥾🌅
🏨 Stay: Wahweap Campground or Hampton Inn Lake Powell
Day 3: Antelope Canyon, Horseshoe Bend & Lake Powell 🏜️📸
🛶 Book: Antelope Canyon Tour (this sells out fast)
🏨 Stay: Zion Canyon Campground or Zion Canyon Lodge or Under Canvas Zion
Day 4: Zion National Park (Angels Landing) ⛰️🌿
🏨 Stay: Zion Canyon Campground or Zion Canyon Lodge or Under Canvas Zion
Day 5: Zion National Park (The Narrows) 🥾💧
🏨 Stay: Zion Canyon Campground or Zion Canyon Lodge or Under Canvas Zion
Day 6: Day Trip to Bryce Canyon National Park 🌄🪨
🏨 Stay: Zion Canyon Campground or Zion Canyon Lodge or Under Canvas Zion
Day 7: Return to Las Vegas via Valley of Fire 🔥🚗
🏨 Stay: Paris Las Vegas or The Cosmo Las Vegas
Route and Drive Times
The route for this national parks road trip is basically a big circle, starting and ending in Las Vegas and covering the Grand Canyon, Zion, and Bryce, as well as Page, Arizona.
I recommend starting with the Grand Canyon, as it’s the longest leg of the trip (4.5 hours). From there, you will continue on from the Grand Canyon to Page, then Page to Zion.
If you follow this itinerary, the second half of the trip in Zion National Park and Bryce Canyon National Park will be much slower-paced than the first half of the trip. During the first couple days, you will be changing locations each day, so it’s a quick start to the trip!
We found this was best, since we had more energy on the first half of the trip than the second half, after days of sleeping in a van and hiking our hearts out!
However, this road trip can be reversed, starting with Zion and ending with the Grand Canyon before heading back to Las Vegas!
The drive times for this itinerary are as follows:
- Las Vegas to Grand Canyon: 4.5 hours
- Grand Canyon to Page: 2.25 hours
- Page to Zion: 1.5 hours
- Zion to Bryce (day trip): 1.25 hours each way
- Zion to Las Vegas: 2.5 hours
P.S. Want to save this itinerary for later? I created a downloadable PDF version of this itinerary that you can print out for your trip! It also has the link to this map 🙂 Just click the link above and enter your email address so I know where to send it!
Pace of Travel
Before we get into the details, let’s talk about the pace of this itinerary, because it’s definitely not for everyone! Understanding your travel style and what you are looking for in a trip will really help your planning process, and I want to make sure anyone can use this itinerary and adjust as needed.
I would categorize this trip as fast-paced and for adventure travelers.. You will be driving over 1000 miles through 3 states in 7 days. You’ll get to experience the Grand Canyon, Zion, AND Bryce, plus a few other spots!
The first 3 days you will be changing locations every evening after exploring all day. I will say – we were a little apprehensive about this before our trip, but it ended up being totally fine! But we are also in our twenties with no kids, in a van, and knew what we were getting into.
If you are looking for a more relaxing, slow-paced national parks road trip, I would highly recommend either adding more days in or cutting out some stops.
For example, you could easily spend a week exploring just Zion and Bryce Canyon. Or you could spend 3 days in the Grand Canyon and still not see and do it all!
This itinerary hits all the highlights of these national parks, which was our goal for the trip. We only had one week and wanted to see and do as much as possible.
Please use this itinerary as guide and adapt as needed to your travel preferences!
Itinerary Starting and End Point – Las Vegas
This National Parks road trip starts and ends in the beautiful Las Vegas, Nevada. You will be journeying over 1000 miles in a circle through Nevada, Arizona, and Utah. Las Vegas is the perfect place to start and end this itinerary for two reasons:
- Harry Reid International Airport is a very popular airport with direct flights from all over the country!
- After spending a week traveling through the desert, Las Vegas is the perfect place to bring yourself back to reality!
We chose to end our trip with one night in Vegas on the back end. To start the trip, we flew into Harry Reid International Airport, picked up our van, went grocery shopping, and immediately hit the road to Grand Canyon!
Now, we personally tackled this road trip in an Escape Campervan, which was an absolute blast. We loved having the camper van as our home on wheels for the week.
We wanted to go “camping” without having to set up a tent or sleep on the ground, and that’s exactly what we got!
The Escape Campervan pick up location is a quick 10-minute Uber ride from the airport, which makes it very convenient.
🚌 You can read about all the details on Renting an Escape Campervan here!


However, you can also use this itinerary while traveling in a standard rental car and staying in hotels. Or tent camping if that’s your thing. Or a combination of both – the possibilities are endless here!
Throughout the itinerary, I will share the campsites that we personally stayed in, as well as some hotel options in case you are going that route!
P.S. I love using DiscoverCars.com when I travel! They compare pricing and availability across a variety of different companies so you get the best rate. Plus, they have an awesome cancellation policy! I recommend booking far in advance to get the best rate.
🚗 Check pricing and availability for rental cars in Las Vegas here! 🚗
Time of Year
I wanted to touch quickly on what time of year is best for conquering this National Parks road trip! We personally did this road trip in mid-October, which I think is the perfect time.
This seemed to be shoulder season for most of the parks, meaning the crowds weren’t at their peak, but it also wasn’t off season.
We had great weather, with some chilly mornings and nights (especially in the Grand Canyon) but warm, sunshine-filled days. This was perfect since we were sleeping in a van with no AC at night! We didn’t want to be sweltering.
Another great time for this trip would be late March – April, which sees similar temperatures to fall.
Most people, however, plan to visit these parks in the summer! You can absolutely conquer this itinerary in the summer. However, just know you might be hot (especially if you are camping) and the parks will be much busier!
Advanced reservations at campsites and hotels are recommended at all times of year due to the popularity of these parks.
Other Things to Know Before Planning Your Trip
America the Beautiful Pass
If you follow this itinerary, you will be visiting 3 different national parks and one national recreation area. The entrance fee to each national park is ~$30, so it makes the most sense to buy an America the Beautiful Pass for the trip.
This pass is only $80 per vehicle (not per person) and gets you into an extensive amount of national parks for a whole year, including the Grand Canyon, Zion, and Bryce. You can order the pass here from REI, and it ships free!
If you plan to visit 3 or more national parks on your trip (or in one year), this pass pays for itself! And don’t worry, if you forget to purchase it in advance of your trip, you can also grab one at any of the National Park entrance gates. We got ours at the Grand Canyon with no issues.
Time Zones Explained
Aside from the pass, you should also know about time zones before the trip!
You will be going back and forth between Pacific Standard Time (PST) and Mountain Standard Time (MST) during this trip. Throughout the itinerary, I will note what time zone you start and end in for each leg, as it will affect your arrival times.
The most confusing part is the state of Arizona falls within Mountain Standard Time but does not observe Daylight Savings. So from approximately April through October every year (Daylight Savings Time), Arizona will be on Pacific Standard Time (PST).
This is the same as California and Nevada, because Arizona does not “spring forward” like the rest of the states on Mountain Standard Time. To make it even more confusing, the Navajo Nation (in which part of Arizona falls) DOES observe Daylight Savings Time. So during these months, different parts of Arizona will be on different time zones… confused yet?!
Luckily, this national parks road trip does not enter the Navajo Nation. Even though the Antelope Canyon tours are run by the Navajo tribe, Page, AZ does not fall within the geographical boundaries of the Navajo Nation, so the time in Page will always follow the time of nearby cities like Phoenix and Flagstaff.
I highly recommend manually setting your phone to Phoenix, AZ as you near Page. This will ensure your phone is on the right time and does not pick up the cellular signal from nearby Utah which is on a different time zone during Daylight Savings..


Day 1: Arrive in Las Vegas & Drive to the Grand Canyon
Distance: 280 miles
Estimated Travel Time: 4 hrs 30 min
Departure Time Zone (Las Vegas): PST
Arrival Time Zone (Grand Canyon, Arizona): MST
Time Zone Note: During Daylight Savings Time (typically April – October), the time in Las Vegas and the Grand Canyon will be the same, as Arizona does not observe daylight savings. In the winter (November – March), the Grand Canyon is one hour ahead of Las Vegas.
As I mentioned, you’ll be flying into the Las Vegas airport to kick off your adventure. I recommend arriving as early as possible, as you’ll be tackling the longest leg of the trip today. After arriving in Las Vegas, you’ll be making the journey to the South Rim of the Grand Canyon, about 4.5 hours away.

Before starting your drive, I highly recommend stopping at a local supermarket and grabbing some snacks and drinks. If you’re going the camping route, you might need a full blown grocery shopping trip – so leave time for that as well!
Because our van had a small refrigerator and stove, our goal was to cook as many meals as possible in the van! We headed to Trader Joes in Vegas before heading out on the first leg to buy all of our groceries. Check out the end of this blog post for a list of what we got!
After stocking up on food, start your drive to the Grand Canyon South Rim. The best route is US-93 South to I-40 East, and then North on US-180. The journey should take around 4.5 hours.
If you’re camping, I highly recommend trying to arrive to your campsite before dark. (Make sure to look up the exact sunset time in the Grand Canyon for the date you are visiting). Unfortunately, we made the rookie mistake of arriving after sunset and had to set up our bed in the dark. It was also very cold at this point!!
If you make it in time for sunset, you can head to Hopi Point (the most popular), Mohave Point, or Pima Point to watch the sun fall behind the Canyon!
Where to Stay in the Grand Canyon
For Camping: If you’re planning to camp, I highly recommend Mather Campground inside the park! There is a bus stop at the front of the campground that will take you to all the main stops throughout the park. This is where we stayed and it was the perfect location.
For Hotels: If you’re not camping, there are a few hotel and cabin options within the park itself, including the Yavapai Lodge, the Bright Angel Lodge, and the historic El Tovar. These are going to be pricier options since you are paying for the convenience of being inside the park.
Your other option is to stay outside the park in the nearby town of Tusayan! As you can see on the map below, this town has several hotel options like the Holiday Inn Resort and the Grand Hotel.
Day 2: Explore Grand Canyon and Drive to Page
Sunrise at Mather Point and Hiking the Bright Angel Trail
Today is the first day of actual adventure on this national parks road trip! The majority of your day will be spent exploring the Grand Canyon South Rim. How long you have here will depend on how early you wake up and how late you want to arrive at your next destination (Page, AZ).
There are tons of things to do in the Grand Canyon in one day, but below is how I recommend spending your time!
First, wake up early to watch the sunrise at Mather Point! I recommend driving from your campsite or hotel directly to the Grand Canyon Visitor Center. From there, you can walk right over to Mather Point in less than 5 minutes.
Mather Point is one of the best places to watch the sunrise in the Grand Canyon! With that said, it gets very busy. We arrived about 30 minutes before sunrise and had no trouble finding a place to watch from. However, if you are hoping to get an unobstructed view or set up a tripod, I would arrive even earlier.
After the sunrise, grab a quick breakfast at the Canyon Village Market or the Yavapai Lodge Café in the Market Plaza (both usually open by 7 AM). These are both located between Mather Campground and the Visitor Center. Unfortunately, the Bike Canyon Café at the Visitor Center opens at 8am, which is probably too late for you.
We chose to eat breakfast in the van back at our campsite, and then head out for the day!

Once you’ve fueled up, I recommend conquering either the Bright Angel Trail or the South Kaibab Trail. We chose to do the Bright Angel Trail and loved it!
To get to Bright Angel Trail, just hop on the Village (Blue) Route shuttle bus and ride it to Bright Angel Lodge station. The trailhead is right behind the lodge!
This is definitely not an “easy” hike by any means, especially the climb back up, but it’s well-paved and you can go as far as you like. We made it to the 1.5-mile rest house in about an hour and had lunch there before starting our climb back up.
Just remember, going down is easy, coming back up takes around twice the time. Bring water, snacks, and a decent daypack. Bonus: this trail has bathrooms and shade at the rest stop!
Note: If you’re not into hiking, one of the most epic things to do is take a helicopter ride into the canyon! I did this with my family when I was a kid and it is still one of coolest experiences I’ve had to this day!


Hermit Road Shuttle
Depending on how long you hike for, you’ll probably be ready for a break. If you didn’t eat lunch on the trail, head to one of the nearby restaurants around Bright Angel Lodge to refuel.
Once you’re rested, hop on the Hermit Road Shuttle. From March through November, this section of the park is only accessible by bus. The full round trip takes about 80 minutes without getting off, and it’s packed with epic canyon views.
This is a great post-hike option because it gives your legs a rest but still lets you soak in more of the scenery. You can also get off at any of the 9 viewpoints, walk a stretch of the Rim Trail, and hop back on at the next stop.
After the shuttle drops you back near Bright Angel Lodge, head back to wherever you left your car.
On your way out of the park, make sure to take the Desert View Drive for a few more scenic spots! This road winds along the South Rim with multiple pull-off points and a less crowded vibe. We loved ending the day here, and it’s on the way to your next destination.
Heading east, Desert View Drive will dump you out on Route 89, which you will take north up to Horseshoe Bend and Page!
Note: The next stop after your day in the Grand Canyon is Horseshoe Bend (near Page) for sunset. If you want to include this in your itinerary, you’ll need to coordinate your departure time from Grand Canyon with the sunset time in Page, AZ. Again, this will depend on the time of year, so make sure to look up the sunset time for your specific date!


Drive From Grand Canyon to Horseshoe Bend / Page
Distance: 132 miles
Estimated Travel Time: 2 hrs 15 min
Departure Time Zone (Grand Canyon, Arizona): Arizona Standard Time
Arrival Time Zone (Page, Arizona): Arizona Standard Time
No matter what time of year you visit, the Grand Canyon and Page will always be on the same time zone (let’s call it Arizona Standard Time). Like I mentioned at the beginning of this post, during Daylight Savings Time, the non-Navajo portion of Arizona (which includes the Grand Canyon, Page, etc.) will be the same time as California and Nevada (Pacific Standard Time, PST).
During non-Daylight Savings Time, (November – March), Arizona is on the same time as Utah, on Mountain Standard Time (MST).
Driving from Grand Canyon to Page will never have a time change (this is true all year long), but this does affect your journey from Las Vegas to Arizona and Arizona to Utah (later in the trip!).
For this route from Grand Canyon to Page, there is no time change. When you arrive in Page, I recommend setting your phone manually to Flagstaff for your time zone. Because you are near the Utah border, sometimes it gets confused on which time zone you are in.
Horseshoe Bend for Sunset
You have just arrived at Horseshoe Bend in Page, AZ for sunset! The cost to visit Horseshoe Bend is $10 per vehicle. This is set by the City of Page and unfortunately the America the Beautiful Pass does not cover it.
The best part of visiting Horseshoe Bend is there’s no strenuous hike required!! You park in a small parking lot and from there, it’s a 10-minute stroll on a paved walkway.
Totally doable for kids and pets too! I recommend arriving at least 30 minutes prior to sunset to get a good spot.
We were absolutely blown away by the beauty of Horseshoe Bend and were spoiled with the most gorgeous sunset! However, it was extremely windy when we visited, which made getting close to the edge a little daunting, so be prepared! Hats are not recommended.


Save this post for later!
Where to Stay Near Horseshoe Bend in Page, AZ
After visiting Horseshoe Bend, it’s time to make your way to your lodging or campsite for the evening.
For Camping: We stayed at Wahweap Campground on Lake Powell. We visited in October, and the campground was pretty much empty.. In the summer, I’m sure this campground is extremely popular, as it’s right on the lake and has all kinds of water toy rentals. So keep that in mind if you’re planning a trip during the summer!
For Hotels: If you’re not camping, there are a lot of different hotel options in the town of Page, like the Hampton Inn & Suites or the Courtyard by Marriot Lake Powell. Staying in Page will put you in close proximity to Lake Powell and Antelope Canyon for tomorrow. Check out the map below for different options!
Day 3: Lake Powell, Antelope Canyon, and Drive to Zion
Fair warning.. this is an action-packed day! You will be visiting Antelope Canyon by both land and water.. and then driving to Zion National Park after. Probably the busiest day of this trip!
If you’re looking for something more slow-paced, I recommend choosing one of the Page activities – either kayaking or doing the walking tour.
In order to fit both in one day, you will have to sign up for a late afternoon Antelope Canyon walking tour. However, the peak tour times for lighting are between 10am and 1pm.
So if your main goal of visiting Page is to photograph Antelope Canyon, I would skip the kayaking portion of this day.
Kayaking to Antelope Canyon
To maximize your time, plan to start your day around 7am and start kayaking by 8am. Grab some breakfast and make your way down to Antelope Point Marina (537 Marina Pkwy, Page, AZ 86040).
If you’re planning this trip in advance (by a few months), you can try calling to see if they take reservations for kayaks.
If you cannot get a reservation here, and you are visiting during peak season, I recommend calling other kayak companies and trying to reserve in advance. It would be awful if you get to Antelope Point Marina and they’re all out.
There are tons of companies in Page that rent kayaks, or you can go on a guided tour! This is a great way to learn more about the area and take the stress out of planning.
Check pricing & availability of guided Antelope Canyon kayaking tours!🛶🏜️
I have a full blog post on kayaking to Antelope Canyon, which will provide you with all the details you need for this activity if you choose to do it alone, but I’ll provide a short summary below as well.
Kayaking to Antelope Canyon involves kayaking through Lake Powell and then turning into the canyon, where the real views are! Once you get far enough into the canyon, you will hit a small beach where you can get out and walk around.
You can decide how far in you want to hike. If you go far enough, you’ll actually reach the narrow walls of Antelope Canyon. We personally didn’t go this far since we had the tour in the afternoon and knew we would see some epic landscapes there!
You can expect kayaking to Antelope Canyon and back to take at least 5 hours. We were surprised by how strenuous it was! We had never kayaked 3+ miles before, and it wore us out!


Antelope Canyon Walking Tour
After finishing your kayaking tour, it’s time to head down the road to an Antelope Canyon walking tour at your designated time slot. Note that this will require advanced reservations!
There are actually two parts of Antelope Canyon with two separate tours: Upper and Lower. Upper Antelope Canyon tends to be more popular due to the shape of the cave walls, and the signature light beams that shine down.
However, we visited Lower Canyon, which is slightly less popular and can be booked with shorter notice! We booked our walking tour with Ken’s Tours, which is just 10 minutes away from the marina.
After arriving for your time slot, you’ll be led into the canyon with a professional guide (you cannot visit without one). Due to the tiny spaces, group sizes are kept to a maximum of 10 people. However, there are many different groups in the canyon at once.
The tour lasts around 45 minutes, and along the way, you’ll learn about the canyon’s geological history from your guide. During our tour, we were not allowed to take videos, only photos.
Overall, the canyon was absolutely beautiful, but we felt a bit like cattle being led through the canyon with hundreds of other people. Still worth it though!
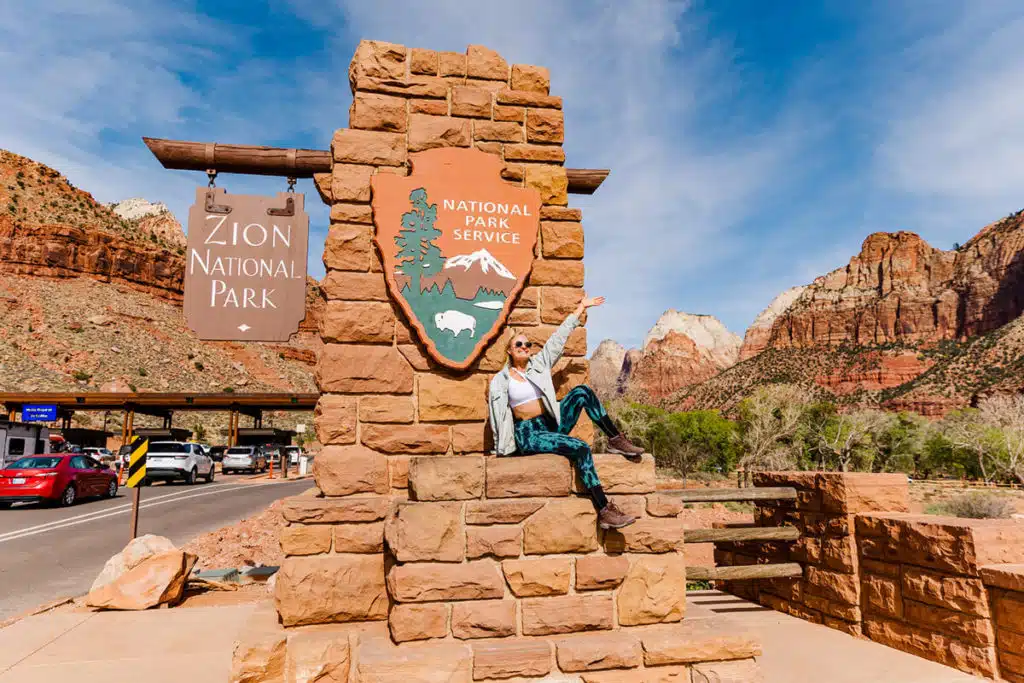
After your walking tour concludes, it’s time to make your way the next stop on this national parks road trip: Zion National Park in Springdale, UT!


Drive to Zion National Park
Distance: 105 miles
Estimated Travel Time: 1 hr 45 min
Departure Time Zone (Page, Arizona): Arizona Standard Time
Arrival Time Zone (Springdale, Utah): Mountain Standard Time
During Daylight Savings Time (typically April – October), the time in Springdale, UT (where Zion is located) and Page, AZ will be different, as the state Arizona does not observe Daylight Savings. Utah will be one hour ahead of Page during this time, so you will lose an hour on this drive.
In the winter (November – March), Page, AZ and Springdale, UT will be on the same time zone (Mountain Standard Time).
So, in the summer, if you leave Page, AZ around 4:30pm local Arizona Time, it will be ~7:15pm MST when you arrive in Springdale, UT.
Remember to set your phone back to the right time zone if you changed it manually while in Page! Once you arrive in town, grab some dinner and go to bed early.. tomorrow you hike Angels Landing!
Read more about the drive from Antelope Canyon to Zion National Park in my guide here! It also includes some of the best places to stop along the way if you are looking to add to this itinerary!
Where to Stay at Zion National Park
Inside the Park:
There are a two different campgrounds (South and Watchman) inside Zion National Park, all of which book up insanely fast and are nearly always full. There is one lodge inside the park, Zion Lodge, which typically books up 6+ months in advance.
Outside the Park:
Staying inside the park definitely has its advantages (you can get right on the shuttle and don’t have to fight for parking). However, if you don’t manage to stay inside the park, it’s no big deal!
In fact, most people stay in the town of Springdale, UT, right outside the park’s entrance. There are campgrounds, budget hotels, and upscale lodges here – something for everyone!
We personally stayed at Zion Canyon Campground in Springdale, which was pricey but definitely worth it! It’s close to the park entrance and had great amenities.
If you’re not camping, I recommend checking out Zion Canyon Lodge or Cable Mountain Lodge. Or, if you don’t mind being a little further from the park’s entrance, you can stay at Under Canvas Zion for some luxury camping (this is on my bucket list!!).
Day 4: Hiking Angels Landing & the Canyon Overlook Trail
Hiking Angels Landing
On your first day in Zion, you’ll be conquering one of the most insane hikes in the USA – Angels Landing!
For hiking Angels Landing, plan to be on the first bus leaving the Zion Visitor Center. If you are staying outside the park, this means arriving even earlier to ensure you can get a parking spot in the Visitor Center.
If the Visitor Center is full, you’ll need to park outside the park and walk in (or take the Springdale Shuttle if it’s too far).
Once you’re on the Zion shuttle, ride the shuttle to Stop #6: The Grotto to begin your hike!
Note: As of April 2022, Zion NPS is requiring permits for the chains section of the Angels Landing hike. This requirement is to make the hike safer and more enjoyable for everyone! Speaking from experience, I think this was definitely needed. The Angels Landing hike is SO much more enjoyable with less people! You can read more about Angels Landing permits here.
The Angels Landing trail is 5 miles round trip and can take anywhere from 3 to 5 hours to complete.
The majority of the hike is moderately difficult, as you make through Refrigerator Canyon and up the legendary Walters Wiggles switchbacks to get to the top of Scout Lookout.
Once you arrive at Scout Lookout, you’ll proceed to the most daunting portion (but least exerting) of the hike – the chains. The entirety of the chains section is only a half mile, which can take between 30 minutes to an hour to complete, depending on your pace and the amount of people on the trail!
Overall, we loved hiking Angels Landing even if it was a bit scary. It’s important to take your time and go slow, especially on the chains section! It looks worse than it is, and you’ll be rewarded with incredible views along the way.
Read my full beginner’s guide to hiking Angel’s Landing here!!


Mt. Carmel Highway and Canyon Overlook Trail
If you start Angels Landing first thing in the morning, you should finish around lunchtime, and your legs will probably feel like jello! I recommend grabbing lunch at one of the many places in Springdale and relax for a few hours.
We went to the Zion Canyon Brew Pub right outside the park entrance to reward ourselves with a big burger and a beer!
Once you’ve recharged, take a drive through the Mt. Carmel Highway in Zion and head to the Canyon Overlook Trail. The views along this road are absolutely gorgeous.. take your time to take them in!
Right after you pass through the long tunnel, find parking on the road or in the small parking lot to the right and walk to the trailhead.
The Zion Canyon Overlook Trail is the perfect short hike after conquering Angels Landing. It’s only about a mile roundtrip, and relatively easy, but the views are absolutely gorgeous. It’s also a great place to watch the sunset!
We spent around an hour here just soaking in the incredible views of Zion Canyon.


Pick Up the Narrows Gear
After you’ve watched the sunset at Canyon Overlook, on your way back to Springdale, make a stop at Zion Outfitter right outside the entrance to the park to rent your gear for tomorrow’s hike… the Narrows!!
What time of year you are visiting will dictate what gear you rent. At a minimum, I highly recommend the shoes, socks, and the walking stick.
After picking up your gear, have some dinner and get some rest – you have another big day tomorrow!
Day 5: Hiking the Narrows & a Scenic Drive
Hiking the Narrows
Okay, you’ve got your gear and you’re up early (hopefully!). Like Angels Landing, hiking the Narrows will be SO much more enjoyable if you start early. The earlier you start, the less people there will be, and you get to take in the views all to yourself.
You can read my full Beginner’s Guide to Hiking the Narrows, but here is a short summary of what you can expect!
- Take the Zion shuttle to the last stop – Temple of Sinawava
- After getting off the shuttle, you will have a one mile hike along the river path before you get in the water. This is called the Riverside Walk!
- After a mile, the path will lead you down stairs and into ankle deep water
- From here, the trail will vary between dirt banks and the river! Be prepared to venture into thigh-deep water, depending on the time of year
- This hike is an out and back hike, which means however far you go in, you will have to hike the same distance out
- There are no bathrooms or water fountains on this trail. Make sure to pack enough food and water for your entire day, and be ready to be creative when you have to pee!
We spent about 5 hours total hiking the Narrows, arriving at the trailhead at 8am and finishing around 1:00pm. Depending on how far you hike in, you could spend less or more time during your hike! For us, 5 hours was the perfect amount.
Overall, we absolutely loved the Narrows. While challenging, wading through water with a walking stick was something I’ll never forget!


Scenic Drive + Photo Ops
Once you’re done hiking the Narrows, I recommend taking the shuttle back to the front of the park and then going directly to Zion Outfitters to return your gear.
Then, you might want to grab a coffee from Feel Love Coffee right across the street and relax for a few hours.. You will be pretty pooped!
In the late afternoon once you’ve recovered, take a drive through the east side park and stop at some of the pull offs for photo ops. The drive through the side of Zion is so gorgeous and a perfect way to spend the afternoon after a long day of hiking.
We were absolutely blown away by the views and stopped multiple times to take photos!
Don’t forget to check out my blog post on the 10 things you need to know before visiting Zion National Park to help plan for this trip!


Day 6: Day Trip from Zion to Bryce Canyon
Distance: 75 miles
Estimated Travel Time: 1 hr 20 min
Departure Time Zone (Zion National Park): Mountain Standard Time
Arrival Time Zone (Bryce Canyon NP): Mountain Standard Time
Time Zone Note: Bryce Canyon and Zion are both located in Utah and will always share the same time zone (Mountain Standard Time, MST).
On Day 6 of this national parks road trip, you’ll be venturing out of town to a new national park – Bryce Canyon!! Bryce Canyon National Park is just 75 miles northeast of the Zion area and makes the perfect day trip. You can also spend the night here if you want more time in the park, but we chose not to!
Bryce is not a huge national park like Zion, so you can easily do it in one day. It’s also a very pretty drive, which makes it even easier! I recommend making or grabbing a quick breakfast and then start your drive from Zion to Bryce Canyon as early as possible.
Note: Bryce Canyon is at a much higher elevation than Zion, so it will probably be colder! Depending on the time of year, it could be warm in Zion and snowing in Bryce, so make sure you to check the weather for both before your trip and plan ahead!


If you’re looking to avoid the crowds, try to arrive at Bryce as early as possible. I also recommend packing a lunch so you can eat in the park, as there’s no real food options.
Once you get into the park (covered by your America the Beautiful Pass), it’s time to tackle the Figure Eight Trail, which combines several of Bryce’s most popular routes into one! This trail includes the iconic Wall Street, Queens Garden, Navajo Loop Switchback, and Peekaboo Loop.
If you do the whole trail, it’s just over 6 miles long and will take a few hours to complete. You can start this trail from either Sunrise Point or Sunset Point, which are only 0.5 miles away from each other and connected via the Rim Trail.
We decided to start at Sunset Point so we could conquer the Navajo Loop Switchback downhill and first thing in the morning without crowds, which I think was a great idea!
If you finish the Figure Eight Trail and still have time before you’re ready to head back to Zion, you can drive over to Lower Inspiration Point and hike the paved path up to Upper Inspiration Point and along the Rim Trail. This area had some incredible views of the legendary hoodoos!!
For more ideas on things to do in the park, I highly recommend checking out my friend Alexys’s Complete Guide to Bryce Canyon!
Once you feel like you’ve seen everything you can, make your way back to Springdale, Utah for your last day in Zion tomorrow!


Day 7: Zion + Fly Home OR Zion + Valley of Fire + Vegas
Today is *technically* the last day of your Grand Canyon, Zion, and Bryce Canyon road trip! But I am laying out a few different options in case you can spare one more day on your trip and want to see an extra park and city!
Option 1: Zion + Fly Home
Distance: 165 miles
Travel Time: 2 hr 30 min
Departure Time Zone (Springdale, UT): Mountain Standard Time
Arrival Time Zone (Las Vegas, NV): Pacific Standard Time
Time Zone Note: This route is not affected by Daylight Savings. You will always gain an hour driving from Zion to Las Vegas. The drive is 2.5 hours, but you will gain an hour going from MST to PST.
If you only have 7 days and today is the last day of your trip, you’ll be heading back to Vegas from Zion to catch your flight home. If you have a late flight out, consider knocking off one more hike in Zion in the morning before hitting the road, like the Emerald Pools trail.
Make sure to give yourself plenty of time to catch your flight in case you hit traffic on the road or anything unexpected happens!
Option 2: Valley of Fire + Vegas + Fly Home
If you can squeeze in an extra day to your trip and have never been, I highly recommend spending your last evening in Las Vegas! After a week on the road, it will feel great to have one more night and fly out first thing in the morning, especially if you’re tackling this itinerary in a van!
Another optional add on for the last day of your trip is visiting Valley of Fire State Park on your way back to Las Vegas!
There are a couple different hikes in Valley of Fire that you can tackle in just a few hours, and it only adds about 45 minutes to your drive from Zion to Las Vegas!
Our primary stop in Valley of Fire was the legendary Mouse Tank Road, where you get epic shots of the winding road with the surrounding mountains. Another popular option is the Fire Wave Trail, which is only 1.5 miles round trip. However, it sometimes closes in the summer due to heat conditions.
During our trip, we tackled both a morning hike in Zion (Emerald Pools) and a few hours in Valley of Fire, and we ended up getting to Vegas around 5pm. If you’re wanting to see more of Vegas during the day, I recommend picking one of those two options, so you can be in Vegas by early afternoon.
Either way, if you decide to spend your last night in Vegas, there are a ton of fun things to see and do. Have a fancy dinner, try your luck gambling, see an iconic show.. there is something for everyone in Las Vegas! I’m working on a “One Day in Las Vegas” guide to help you pick!


Packing Essentials for Grand Canyon, Zion, and Bryce
Your packing list for a trip to the Grand Canyon, Zion, and Bryce will be very much dependent on the weather.
For example, summers in Zion National Park often see temperatures in the 100s, but in the winter, lows can be well below freezing. Bryce Canyon is typically 10-20 degrees colder than it is at Zion, and cold nights are common in the desert of the Grand Canyon.
With that said, you will need to check the weather for each park before your trip and plan accordingly! But regardless of the time of year you visit, these few items below will be essential for you trip:
1. Good Hiking Boots
This might seem obvious, but you definitely need to invest in a good pair of hiking boots for your National Parks trip. I wore these boots every single day, no blisters, no pain. I am prone to tripping and spraining my ankle.. but had no issue in these!
2. Day pack with water bladder
I never owned a backpack with a bladder before, but I bought this one from Amazon for the trip! Not having to lug around a water bottle every day was great, and having hands free access to water comes in handy (see what I did there?!) when you are kayaking in Antelope Canyon or climbing the chains on Angel’s Landing! So I highly recommend this backpack – it was the perfect size and only $30!
3. Sunscreen
I will scream this from the mountain tops until I am blue in the face! If you are going to be outside, you need to wear sunscreen. Even if it’s cold. Even if its cloudy!! If you hate the feeling of sunscreen, I highly recommend Supergoop! It’s my favorite brand ever (not sponsored) but I will recommend them forever.


Grocery List for the Van
As promised, here are some things we packed / made during the trip in our Escape Campervan. The van had a small fridge as well as a propane stove, so we were able to make a lot of things ourselves!
- Breakfast: Oatmeal with nut butter and blueberries, canned coffee, granola bars, bananas
- Lunches: Turkey wraps, peanut butter and jelly sandwiches
- Dinners: Tacos, Quesadillas, Spaghetti with meat sauce
- Snacks: Dried fruit, trail mix, beef jerky, protein shakes, hot chocolate!
- Plenty of bottled water!! We ended up buying like 7 gallons total!
Final Thoughts
That concludes my one-week US National Parks road trip itinerary for the Grand Canyon, Zion, Bryce, and Page! We had an absolute blast on our trip, driving over 1000 miles in an Escape Campervan. I know this itinerary is extremely long, but I hope it has helped you plan your own epic adventure!
As you can see, there is a ton to see and do on this itinerary, and you can easily add on more days and more parks. If you’re looking to add on to this trip, I recommend checking out the following places!
- Sedona and Flagstaff (Arizona)
- Canyonlands National Park (Utah)
- Arches National Park (Utah)
- Joshua Tree National Park (Cali)
If you have less than a week, I recommend cutting out Page and/or the Grand Canyon and focusing on Zion and Bryce, as you can easily spend 5 days exploring these park alone. If you choose the first option, be sure to check out my guide on how to spend one full day in the Grand Canyon!
Read my other blog posts about Zion, Grand Canyon, and Antelope Canyon below!
ULTIMATE Grand Canyon, Zion, and Bryce Canyon Road Trip
How To Spend One Day In The Grand Canyon (Ultimate One Day Itinerary)
Kayaking To Antelope Canyon: A Detailed Guide
Zion National Park To Antelope Canyon: Mini Road Trip Guide
10 Things You Need To Know Before Visiting Zion National Park
Zion National Park Itinerary: How To Spend 3 Perfect Days In Zion
A Beginner’s Guide To Hiking The Narrows In Zion National Park
Hiking Angels Landing: A Beginner’s Guide
Renting An Escape Camper Van: Everything You Need To Know
Don’t forget to pin this post for future planning!


